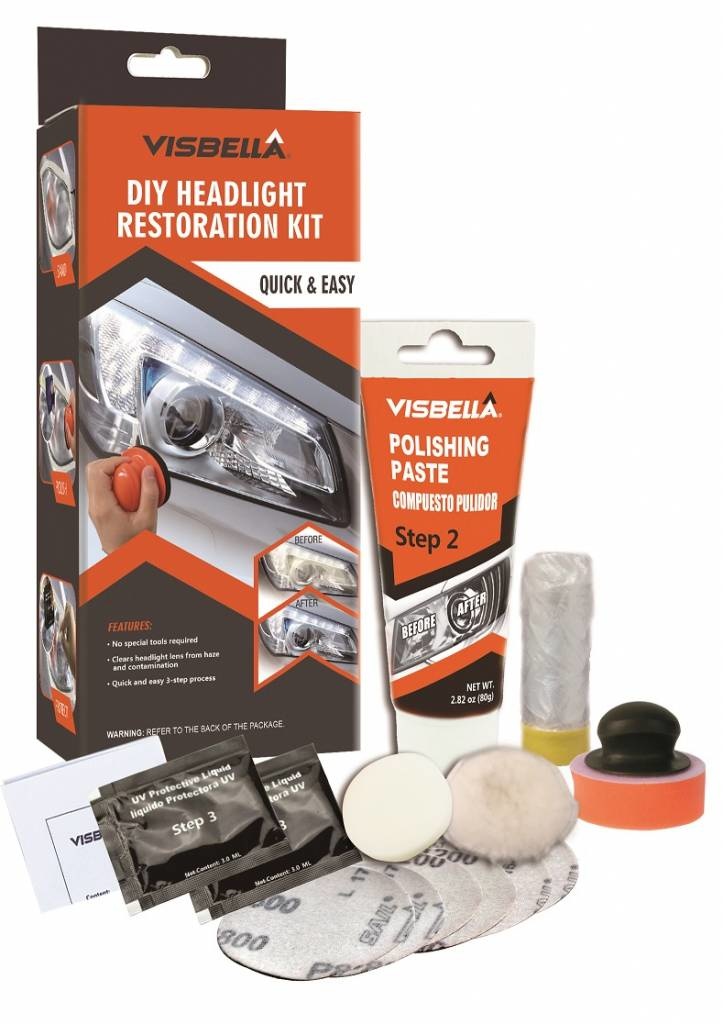
TM headlights polishing set complete Manual XL
- Scherpste prijzen
- 300,000+ tevreden klanten
- Fysieke winkel
- Groot voorraad


TOOLMANIA Headlight repair kit is designed to eliminate the worst cases of headlamp degradation, yellowing, oxidation and scratches from your headlights. It includes everything needed to repair the most cloudy or sun-damaged lenses. Get good results on most plastic lenses, such as headlights, taillights, trailers, boat windows, helmet visors, motorbike windows and more. Professional results can be produced with this easy-to-use kit at a fraction of the cost.
Product description data of the TM headlights polishing set complete Manual.
Headlight Recovery kit for carsTM Headlight Repair kit for removing scratches, dust spots and discoloration from headlights. The TM Headlight Repair Set let the headlights of the car look like new again, allowing you to benefit from optimal light output for better visibility on the road! This repair kit for car headlamps can be applied to plastic surfaces. Repair damaged and dull headlightsThis repair kit contains all products to fully repair weathered, dull and yellowed headlights and to bring them in new condition. After the treatment with the TM Headlight Repair Kit, the headlights look like new again. The headlight does not have to be disassembled from the car before the treatment. This allows you to easily do it yourself! Also for other plastic surfacesThis repair set for headlights can also be used on other plastic surfaces. Think of boat windows, helmet visors, windshields, backlights and trailer lights. How do I use this Headlight Repair KitIn order to properly repair the headlights of the car with the TM Headlight Preparation Set, we recommend the following steps. Step 1: Clean the surfaceClean the plastic of the headlight with water. Stick the area around the lens to avoid scratching on sprayed surfaces. Step 2: Sanding the headlightWet the sanding disc and secure it to the supplied holder. Sand with three different grain sizes to completely remove serious yellowing, dullness and rust. Use the sanding discs from coarse to fine: P800, P1200, P2000. Step 3: Polish the headlightAttach the orange polishing disc to the holder and apply the polishing paste. Polish the lens of the headlight until the shine is restored to new condition. For best results, use an electric polishing or drilling machine. If you polish by hand, polish with at least 200 revolving movements clockwise. Step 4: Protect the headlightClean the lens of the headlight and make sure it is dry before applying the protective coating. Use the white polishing disc from the kit. Apply the protective fluid evenly to the surface of the headlight. Make sure that you do not apply this directly in the sunlight. The protection liquid will form a layer on the headlight, fully cured. Let the liquid dry for at least 2 hours in direct sunlight. After step 3, the lens of the headlamp should remain dry for 24 hours. Benefits of this DIY Headlight Recovery kitThis do-it-yourself repair set for headlights, allows you to easily and quickly repair the headlights of the car. This makes the car headlights function bright and clear, which contributes to safety on the road. This set is intended to repair 2 headlights. |
Show more
Alternatieve producten in ons assortiment